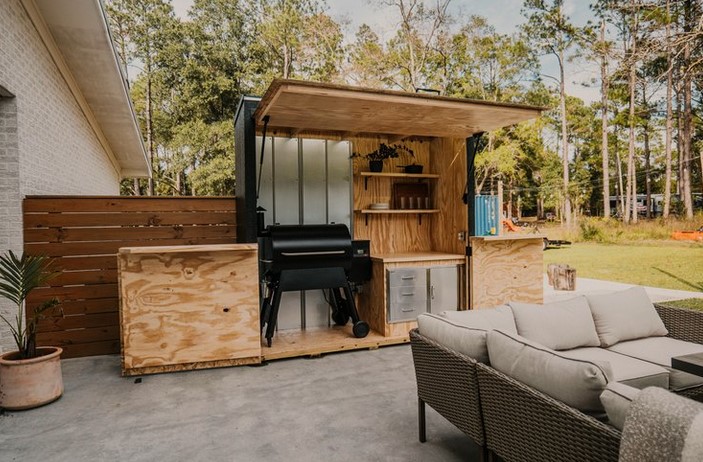
An outdoor kitchen is a perfect addition to any backyard, offering an inviting space for cooking, entertaining, and enjoying meals al fresco. Whether you’re hosting a barbecue with friends or preparing a family dinner under the stars, an outdoor kitchen can elevate your outdoor living experience. One of the most important steps in building an outdoor kitchen is constructing the outdoor kitchen frame, which serves as the structure to support appliances, countertops, and storage. In this step-by-step guide, we will walk you through the process of building a durable and functional frame that will form the backbone of your outdoor kitchen.
Constructing an outdoor kitchen frame might seem like a daunting task, but with the right tools, materials, and guidance, it’s a manageable DIY project. From selecting the right materials to following proper construction techniques, this guide will equip you with the knowledge needed to create a sturdy and long-lasting outdoor kitchen frame that can withstand the elements and provide a solid foundation for your cooking area. Let’s dive into the steps to build your outdoor kitchen frame and turn your backyard into the perfect place for outdoor cooking.
1. Planning and Preparing for the Build
Before you begin building your outdoor kitchen frame, it’s essential to take the time to plan out your design and prepare the space. Proper planning will help ensure that your frame is the right size and shape, and that all necessary utilities, such as plumbing and electricity, are considered in the design.
Determine the Layout
Start by sketching a layout of your outdoor kitchen, noting where you want to place major components like the grill, sink, counter space, and storage. Make sure to consider the flow of the space so that your work triangle—grill, sink, and prep area—is efficient. You also need to plan for any seating or dining areas that may be integrated into the space.
Once you have a clear idea of your kitchen’s layout, measure the dimensions of the area to ensure that everything will fit properly. This will help you determine the overall size of the outdoor kitchen frame and ensure that there’s enough room for comfortable movement.
Choose the Right Materials
The materials used for your outdoor kitchen frame should be durable and resistant to the elements. Pressure-treated wood, stainless steel, and masonry blocks are all excellent options for building a sturdy frame. Pressure-treated wood is a good choice if you’re looking for a cost-effective solution that can be easily cut and shaped. Stainless steel, while more expensive, offers exceptional durability and resistance to rust and corrosion. If you prefer a more permanent structure, masonry blocks (such as cinder blocks or bricks) are a strong and long-lasting option.
In addition to the frame materials, consider the finishing materials for your countertop and exterior surfaces. Granite, concrete, or tile are popular choices for outdoor kitchens due to their durability and ability to withstand the outdoors.
Gather Tools and Supplies
Before you start building, gather all the tools and supplies you’ll need for the project. Common tools for constructing an outdoor kitchen frame include:
- Measuring tape and level
- Saw (for wood or masonry)
- Drill and screws (for wood)
- Concrete mix (for masonry)
- Hammer and nails
- Protective gloves and safety glasses
Having everything ready before you start will help keep the construction process smooth and efficient.
2. Constructing the Outdoor Kitchen Frame
Now that you’ve planned and prepared, it’s time to begin the construction of your outdoor kitchen frame. Whether you’re using wood, steel, or masonry, the basic process remains the same: you’ll be building a strong, level foundation that will support your outdoor kitchen.
Step 1: Build the Base Frame
Start by building the base frame for your outdoor kitchen. If you’re using wood, create a rectangular frame using 2×4 or 2×6 pressure-treated lumber. This frame will provide the support for the rest of the kitchen’s structure. Use a level to ensure that your base is perfectly level and square.
For a masonry frame, you’ll need to lay a solid foundation using cinder blocks or bricks. Ensure the blocks are level and well-spaced to create a sturdy foundation. This type of base will provide excellent support for countertops and appliances, though it may require more time and effort to construct.
Step 2: Add Vertical Supports
Next, add vertical supports to the base frame. These supports will hold the countertop and provide stability to the frame. For a wooden structure, use 4×4 posts spaced evenly along the length of the frame. If you’re using masonry blocks, stack blocks vertically to create strong supports for the countertop.
Make sure to secure the vertical supports with screws or masonry adhesive to ensure they are tightly fastened and won’t shift over time. For a more industrial look, stainless steel poles or beams can also be used as supports for a modern aesthetic.
Step 3: Install Horizontal Beams
Once the vertical supports are in place, add horizontal beams across the frame. These beams will help to distribute weight evenly and provide additional stability. For a wooden structure, use 2x4s or 2x6s to create the horizontal framework. Secure the beams with screws, making sure they’re level and aligned.
In the case of masonry construction, you may need to use metal reinforcement bars (rebar) to tie the blocks together for added strength.
Step 4: Frame the Openings for Appliances
If you’re incorporating appliances like a grill, sink, or refrigerator, be sure to frame openings for these units. Measure the dimensions of each appliance carefully and cut or leave spaces in the frame to fit them. For example, if you’re installing a built-in grill, make sure there’s enough space for both the grill and its ventilation system. You may need to adjust your frame to accommodate these appliances or make additional modifications to your design.
Ensure that the frame around each appliance is properly secured and level, as these units will be heavy and require a stable structure.
3. Finishing Touches: Preparing for Countertops and Exterior
Once the main structure of your outdoor kitchen frame is complete, it’s time to focus on the finishing touches. This includes adding countertop surfaces, choosing exterior cladding, and installing any necessary utilities.
Install Countertops
Once the frame is fully constructed, you can install countertops. If you’re using a wood frame, make sure to attach the countertop materials securely to the top of the frame. Popular outdoor countertop materials include granite, concrete, or tile, which are all durable and resistant to weather.
For masonry frames, you can either install a pre-made countertop or pour a custom concrete countertop. Make sure the countertop is level and securely attached to the frame to prevent shifting.
Add Exterior Cladding
To protect the frame and give your outdoor kitchen a polished appearance, consider adding cladding to the exterior. For wood frames, you can use cedar, teak, or another durable, weather-resistant wood. For masonry frames, stone veneer or stucco is a popular choice to provide an attractive and protective finish.
Install Utilities
If your outdoor kitchen includes plumbing, electricity, or gas lines, this is the stage where you’ll need to hook up those utilities. It’s best to hire a professional plumber or electrician for this step to ensure everything is properly installed and up to code.
Building an outdoor kitchen frame is the first and most crucial step in creating a functional and beautiful outdoor cooking space. With the right materials, tools, and careful planning, you can construct a sturdy frame that will support your kitchen appliances and withstand the outdoor elements. From preparing the space and choosing the right materials to framing the structure and adding finishing touches, every step is essential to creating a long-lasting and enjoyable outdoor kitchen. By following this guide, you’ll be well on your way to designing a backyard oasis that’s perfect for cooking and entertaining.
