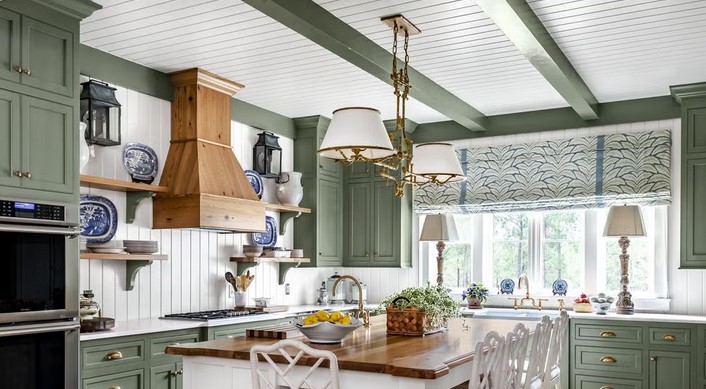
Building a rustic table is a rewarding DIY project that can add charm and character to any room in your home. Whether you’re looking to create a cozy farmhouse dining table, a sturdy coffee table, or a rustic-style desk, learning how to build a rustic table is a great way to enhance your living space while honing your woodworking skills. A rustic table can bring warmth and timeless beauty to your home, and it’s surprisingly achievable with the right materials, tools, and techniques. In this article, we’ll guide you through the process of constructing a beautiful rustic table, from planning and gathering materials to assembly and finishing touches.
Whether you’re a seasoned woodworker or a beginner, building a rustic table can be both fun and fulfilling. The beauty of rustic furniture lies in its imperfections—each piece of wood tells a story through its grain, knots, and color variations. With just a little guidance, you’ll be able to craft a table that will not only serve as a functional piece of furniture but also as a standout feature in your home.
1. Planning and Gathering Materials for Your Rustic Table
Before you begin building your rustic table, it’s essential to plan out your design and gather all necessary materials. The planning phase is where you decide on the size, style, and overall look of your table. It’s important to take your time during this step to ensure that the finished piece will fit your space and complement your existing decor.
Determine the Table Size and Style
Start by deciding what type of table you want to build. Will it be a large dining table, a smaller side table, or something in between? Consider the space where the table will be placed and how many people you want it to seat. For instance, a standard dining table typically seats four to six people, while a larger table can accommodate more. You can always adjust the size based on the dimensions of your room or needs.
For a rustic table, you have the option to use reclaimed wood, which will add more character and history to the piece. You can also choose new, unfinished wood if you want a cleaner and more consistent appearance. The rustic style often incorporates thick, solid wood pieces with visible grain and texture, so be sure to choose materials that reflect that.
Materials You’ll Need
To build your rustic table, you’ll need the following materials:
- Wood: Choose hardwood such as oak, pine, or walnut for durability and a rustic look. You can select a variety of sizes and lengths, depending on the design.
- Table legs: You can either build your own legs from wood or purchase pre-made metal or wooden legs for a more industrial or contemporary touch.
- Screws: Use wood screws that are long enough to securely attach the tabletop to the legs.
- Wood glue: This will help keep the wood pieces together, especially if you are creating a tabletop from multiple boards.
- Finish: Choose a finish that enhances the natural grain of the wood, such as oil-based polyurethane, beeswax, or a matte wood stain.
Tools You’ll Need
To build your rustic table, you’ll need a few basic woodworking tools:
- Circular saw (or a table saw, if you have one)
- Drill with screws and bits
- Measuring tape and square
- Sandpaper (or a sander): For smoothing out rough edges
- Clamps: To hold the wood together while you glue and screw it in place
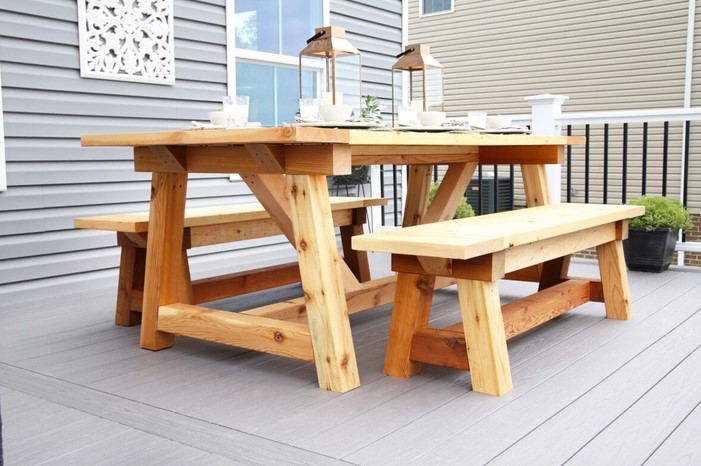
2. Building the Rustic Table: Step-by-Step Process
Once you’ve gathered all your materials and tools, it’s time to start building your rustic table. This step-by-step guide will walk you through the process of assembling the tabletop, attaching the legs, and finishing the table.
Step 1: Cut the Wood Pieces
Begin by cutting your wood pieces to the desired length. If you’re building a rectangular tabletop, you’ll need several boards that are the same length. For a more traditional look, you can leave the edges of the wood rough or uneven to give it that rustic feel.
Measure and cut the wood for the tabletop, making sure the pieces fit together perfectly. For example, if you’re using multiple planks to create a wider surface, align them edge to edge and trim them to the same length. Use wood glue to bond the planks together, and clamp them while they dry to ensure a strong bond.
After the tabletop pieces are securely glued together, let the glue dry for a few hours before sanding the surface. Sand the top and edges to eliminate any rough spots and achieve a smooth surface, but remember to leave some of the natural texture of the wood exposed to maintain the rustic aesthetic.
Step 2: Construct the Frame
Now, it’s time to build the frame that will support the tabletop. Start by cutting the wood for the table’s legs and support beams. If you want a simple design, you can opt for straight legs, but if you prefer a more decorative touch, you can add angled or turned legs. For a truly rustic look, consider using reclaimed wood with visible knots or imperfections.
Measure and cut the leg pieces to your desired height, and then attach them to the four corners of the tabletop. To secure the legs, you can use screws or wooden dowels. Be sure to use wood glue in addition to screws to provide added stability.
Step 3: Assemble and Attach the Legs
Once the frame and legs are ready, attach the legs to the underside of the tabletop. Use screws to secure each leg to the corners of the tabletop, ensuring that they are positioned squarely and evenly. You can also add additional support beams between the legs for extra strength. These beams will also contribute to the table’s overall rustic design and help prevent wobbling.
Use clamps to hold everything in place while you screw the parts together. Double-check the alignment of the legs to ensure the table is stable and level before tightening the screws completely.
Step 4: Sand and Finish the Table
After the table is assembled, sand the entire piece to remove any rough spots, sharp edges, or excess glue. Sanding is an essential step, as it smooths out the wood while maintaining the natural feel of the rustic style.
Once the table is smooth, apply a finish to protect the wood and enhance its beauty. You can use a wood stain to darken or enrich the color, or opt for a clear finish such as polyurethane or beeswax for a natural look. Apply the finish evenly and let it dry completely before using the table.
3. Adding Final Touches: Personalizing Your Rustic Table
Once your rustic table is assembled and finished, it’s time to personalize it to suit your style and space. There are several ways to add a unique touch to your table and make it truly your own.
Add Decorative Elements
You can enhance the rustic look of your table by incorporating decorative elements such as distressed metal brackets, leather straps, or rustic handles. These can be used as accents on the table legs or as decorative details along the edges of the tabletop.
Additionally, adding a protective table runner or a centerpiece such as a vase of flowers, candles, or a wooden tray can bring a personal touch to the space.
Consider the Environment
The environment in which your table will be placed plays an important role in its final design. If you plan to use the rustic table indoors, make sure it complements your existing furniture and decor. For an outdoor rustic table, make sure to treat the wood with a weather-resistant finish to protect it from the elements.
Learning how to build a rustic table is a rewarding project that allows you to create a beautiful, functional piece of furniture tailored to your needs and aesthetic preferences. By following this step-by-step guide, from gathering materials to finishing the table, you’ll be able to craft a rustic table that is not only sturdy and practical but also full of character and charm. Whether you’re creating a farmhouse-style dining table, a rustic coffee table, or a custom side table, building your own furniture is a fulfilling experience that will result in a unique piece you can cherish for years to come.