Introduction
Welcome to “The Ultimate Guide to DIY Stuffed Animal Storage Solutions,” a delightful and practical resource that will revolutionize the way you organize and store your little ones’ cherished plush companions. Say goodbye to cluttered floors and welcome a world of ingenious, homemade storage ideas that will not only keep those cuddly critters safe but also add a touch of whimsy and creativity to any space. Get ready to embark on a journey of fun and efficiency as we unleash a myriad of brilliant DIY solutions to tame the stuffed animal chaos!
Stuffed animals have a unique way of capturing our hearts and bringing joy to our lives. However, as any parent or plush enthusiast knows, they can quickly take over a room and create clutter. With a bit of creativity and resourcefulness, you can easily create DIY stuffed animal storage solutions that are not only practical but also add a touch of charm to any space. In this ultimate guide, we will explore a variety of ingenious and easy-to-implement ideas to keep those adorable furry friends organized and tidy.
1. The Classic Toy Hammock
One of the simplest and most classic DIY stuffed animal storage solutions is the toy hammock. This easy-to-make solution requires nothing more than a few yards of mesh or netting and some hooks or wall anchors. Simply measure and cut the mesh to your desired size, attach the hooks to the walls, and suspend the hammock in a corner or along a wall. The stuffed animals can be placed inside, giving the illusion that they are comfortably lounging in their own little hammock paradise.
2. Repurposed Storage Baskets
Transform old or unused baskets into stylish stuffed animal storage units. Whether they are wicker, wire, or fabric baskets, these can make an aesthetically pleasing storage solution. Customize them by adding colorful fabric liners or labels to easily identify which stuffed animals belong where. Baskets can be stacked, placed on shelves, or even hung on the wall to maximize space and create an inviting display.
3. Hanging Shoe Organizers
If you’re looking for an inexpensive and readily available solution, repurpose a hanging shoe organizer for stuffed animal storage. These organizers typically have multiple compartments, making them perfect for organizing plush toys. Hang them on the back of a door, inside a closet, or along a wall, and you’ll have an instant storage solution that keeps stuffed animals easily accessible and neatly arranged.
4. DIY Fabric Storage Bins
Crafting your own fabric storage bins allows you to personalize the size, pattern, and colors to match your decor. Using sturdy fabric and cardboard inserts, you can create custom-sized bins that fit perfectly on shelves, under beds, or in cubbies. These bins not only keep stuffed animals in order but also add a delightful touch to the room’s ambiance.
5. Repurposed Ladder Display
A vintage ladder can be given a new lease on life as a charming stuffed animal display. Sand and paint the ladder to suit your taste, and then hang it horizontally on the wall. Place the stuffed animals on the rungs, and you’ve created an eye-catching and whimsical feature that also acts as functional storage.
6. Stuffed Animal Bean Bag Chair
Combine comfort and practicality with a DIY stuffed animal bean bag chair. Fill a large fabric bag with stuffed animals to create a cozy sitting space. Not only will it provide a comfortable spot for your child to read or relax, but it also keeps the stuffed animals contained in a fun and playful way.
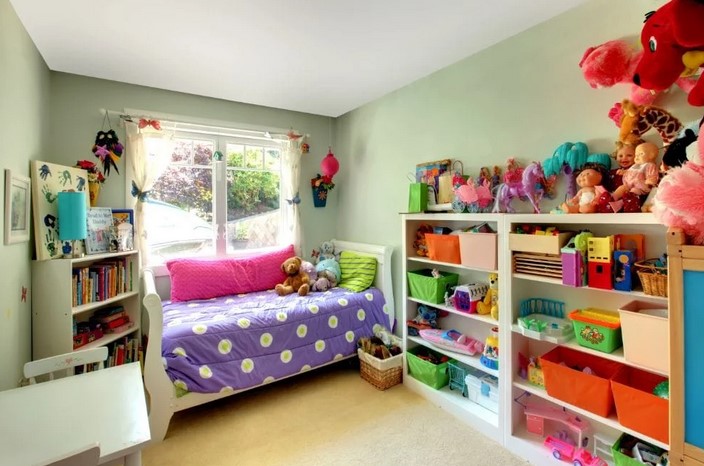
7. Bookshelf Storage
Utilize bookshelves as creative storage for stuffed animals. By dedicating one or more shelves to plush toys, you can create an organized and visually appealing display. Customize the shelves by adding bins, boxes, or baskets to keep smaller plushies together. This way, your child can easily find and put away their favorite furry companions.
8. Under-the-Bed Stuffed Animal Drawers
Utilize the often underutilized space under the bed by adding drawers or rolling bins specifically for stuffed animal storage. These drawers can be easily pulled out, and the plush toys can be sorted by type or size, making it simple to find the perfect cuddle buddy.
9. Magnetic Wall Display
For a unique and space-saving solution, create a magnetic wall display for your stuffed animals. Glue small magnets to the back of each plush toy and adhere them to a magnetic board or metal sheet mounted on the wall. This creates a floating illusion, and the kids will have a blast rearranging the toys to their heart’s content.
10. Repurposed Storage Ottoman
Transform a storage ottoman into a dual-purpose piece of furniture by using it to store stuffed animals. These ottomans offer a discreet and stylish storage solution. Moreover, they can serve as seating or a table in your child’s room, enhancing both organization and functionality.
With these creative and practical DIY stuffed animal storage solutions, you can turn the chaotic sea of plush toys into a charming and organized space that sparks joy for your child. Embrace your creativity and make use of materials you already have, turning everyday objects into delightful storage solutions. Whether it’s a toy hammock, hanging shoe organizer, or a repurposed ladder display, these ideas will not only keep the stuffed animals neatly arranged but also add a touch of personality and warmth to your child’s space. Enjoy the process of crafting and organizing while creating a clutter-free environment that encourages playfulness and creativity.