Chalkboard Chronicle: Creating a Large Framed Chalkboard is a comprehensive guide that provides step-by-step instructions on how to create a large, framed chalkboard. This guide is perfect for those who want to add a rustic, vintage touch to their home or office decor. It covers everything from selecting the right materials, preparing the chalkboard surface, framing the chalkboard, to maintaining it. The guide also offers tips and tricks to make the process easier and ensure the final product is both functional and aesthetically pleasing.
Mastering the Art of Creating a Large Framed Chalkboard: A Step-by-Step Guide
Creating a large framed chalkboard is an art that can be mastered with a little patience, creativity, and the right tools. This chalkboard chronicle will guide you through the process, providing a step-by-step guide to help you create a functional and aesthetically pleasing piece for your home or office.
The first step in creating a large framed chalkboard is to gather your materials. You will need a large piece of plywood, chalkboard paint, a paint roller, a frame, and chalk. The size of the plywood should correspond to the size of the frame you have chosen. It’s important to choose a frame that is sturdy and can support the weight of the plywood.
Once you have your materials, the next step is to paint the plywood with the chalkboard paint. This is a crucial step in the process, as the paint will transform the plywood into a writable surface. Apply the paint evenly with the roller, ensuring that there are no bubbles or streaks. It’s recommended to apply at least two coats of paint, allowing each coat to dry thoroughly before applying the next.
After the paint has dried, the next step is to attach the frame to the plywood. This can be done using a variety of methods, depending on the type of frame you have chosen. Some frames may have pre-drilled holes, allowing you to simply screw the frame into the plywood. Others may require a more complex method, such as using a staple gun or adhesive. Regardless of the method, it’s important to ensure that the frame is securely attached and that it is aligned properly.
Once the frame is attached, the final step is to prepare the chalkboard for use. This is done by “seasoning” the chalkboard, a process that involves rubbing the side of a piece of chalk all over the surface, then erasing it. This step is important as it prevents your first piece of writing from leaving permanent marks on the board.
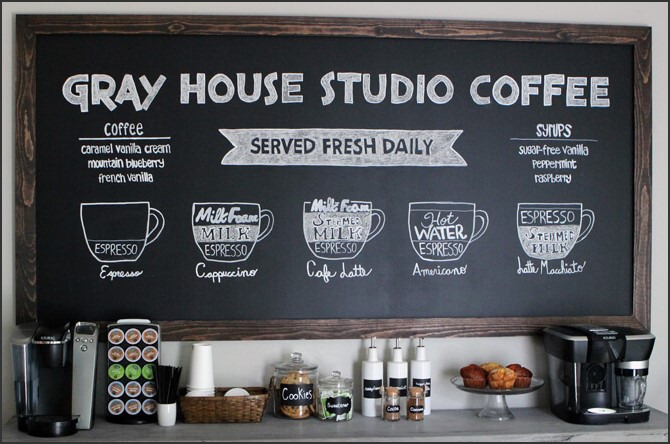
Creating a large framed chalkboard is a project that requires time and patience, but the end result is a functional and attractive addition to any space. Whether you’re using it as a menu board in a restaurant, a calendar in a home office, or a learning tool in a classroom, a chalkboard offers a unique and interactive way to communicate.
In conclusion, mastering the art of creating a large framed chalkboard involves gathering the right materials, applying chalkboard paint to a piece of plywood, attaching a frame, and preparing the chalkboard for use. With a little patience and creativity, you can create a chalkboard that is not only functional but also a reflection of your personal style. This chalkboard chronicle has provided a step-by-step guide to help you through the process, and with these tips in mind, you’re well on your way to creating your own large framed chalkboard.
