Block Beauty: Crafting Your Own Butcher Block Countertop is a comprehensive guide that provides step-by-step instructions on how to create a butcher block countertop. This guide is designed for DIY enthusiasts who want to add a touch of rustic charm to their kitchen by installing a butcher block countertop. It covers everything from selecting the right type of wood, cutting and assembling the blocks, to finishing and maintaining the countertop. With this guide, you can transform your kitchen countertop into a functional and aesthetically pleasing butcher block.
Step-by-Step Guide: How to Make a Butcher Block Countertop for a Block Beauty Kitchen
Butcher block countertops are a timeless addition to any kitchen, offering both functionality and aesthetic appeal. They provide a sturdy, durable surface for food preparation, while their natural wood grain adds warmth and character to the space. If you’re considering a kitchen upgrade, crafting your own butcher block countertop can be a rewarding project. This step-by-step guide will walk you through the process, helping you create a block beauty kitchen that’s uniquely yours.
The first step in creating a butcher block countertop is selecting the right wood. Hardwoods such as maple, oak, and walnut are popular choices due to their durability and attractive grain patterns. It’s important to choose kiln-dried wood, as it has been properly treated to remove moisture, preventing warping and cracking over time.
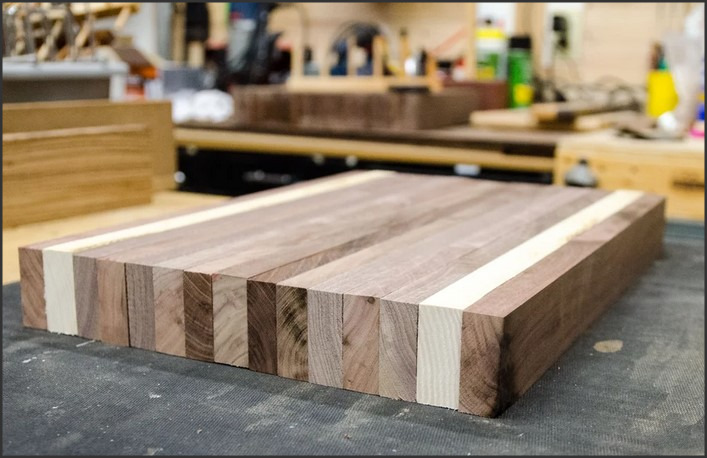
Once you’ve chosen your wood, the next step is to cut it into strips. The width of these strips will determine the thickness of your countertop, so consider your needs and preferences. A standard butcher block countertop is typically 1.5 to 2 inches thick. After cutting the strips, arrange them side by side and apply wood glue along the edges. Clamp the strips together and let the glue dry overnight.
After the glue has dried, it’s time to sand the surface. Start with a coarse-grit sandpaper to level the surface, then gradually move to finer grits for a smooth finish. This step is crucial in achieving a professional-looking result, so take your time and ensure all imperfections are smoothed out.
Next, you’ll need to seal the countertop to protect it from moisture and stains. There are several options for this, including oil-based finishes and water-based polyurethane. Oil-based finishes penetrate the wood, enhancing its natural color and grain. They also offer easy maintenance, as they can be reapplied as needed. Water-based polyurethane, on the other hand, forms a hard, protective layer on the surface. It’s more durable than oil-based finishes, but it can alter the wood’s color and requires more effort to apply.
Once the sealant has dried, your butcher block countertop is ready to be installed. This involves attaching it to your cabinets with screws, ensuring it’s level and secure. It’s recommended to pre-drill holes to prevent splitting the wood.
Finally, maintaining your butcher block countertop is key to its longevity. Regular cleaning with mild soap and water is essential, and it’s advisable to reapply the finish periodically to keep the wood protected. Avoid leaving standing water on the surface, as this can cause damage over time.
In conclusion, crafting your own butcher block countertop is a project that requires careful planning and execution, but the result is a beautiful, functional addition to your kitchen. By selecting the right wood, properly preparing and sealing it, and maintaining it with care, you can enjoy the block beauty of your kitchen for many years to come. Whether you’re a seasoned DIY enthusiast or a beginner, this project offers a rewarding experience and a chance to personalize your space.
